เพิ่มการยืนยันตัวตนให้กับแอป iOS (Swift) ของคุณ
คู่มือนี้ถือว่าคุณได้สร้างแอปพลิเคชันประเภท "Native app" ใน Admin Console แล้ว
การติดตั้ง
The minimum supported iOS version of Logto Swift SDK is iOS 13.
Logto Swift SDK comes in two major versions:
- v1: Opens the sign-in experience in an embedded WebView, which is required by the native social plugin targets, but does not support passkey sign-in (WebView does not support WebAuthn, the underlying standard of passkeys).
- v2 (beta): Opens the sign-in experience in
ASWebAuthenticationSession(the system browser), which unlocks passkey sign-in and shares the browser session. Note that v2 removes the native social plugin targets; social connectors still work through the browser. If you depend on the native WeChat or Alipay SDK handoff, stay on v1.
This guide covers both versions. Choose your version in the tabs below, and the choice will be kept in sync throughout this guide.
Use the following URL to add Logto SDK as a dependency in Swift Package Manager.
https://github.com/logto-io/swift.git
Since Xcode 11, you can directly import a Swift package w/o any additional tool.
When Xcode asks for the package version, choose the version you want to integrate:
- v2 (beta)
- v1
v2 is released as 2.0.0-beta.x prereleases until GA. Use 2.0.0-beta.1 or the latest 2.0.0-beta.x prerelease as the version. During beta, we recommend selecting the prerelease explicitly instead of relying on a normal version range to pick it automatically.
If you use Package.swift directly:
.package(url: "https://github.com/logto-io/swift.git", exact: "2.0.0-beta.1")
Use the latest v1 release as the stable line. The latest v1 version is 1.2.0.
If you use Package.swift directly:
.package(url: "https://github.com/logto-io/swift.git", from: "1.2.0")
We do not support Carthage and CocoaPods at the time due to some technical issues.
Carthage
Carthage needs a xcodeproj file to build. We will try to find a workaround later.
CocoaPods
CocoaPods does not support local dependency and monorepo, thus it's hard to create a .podspec for this repo.
การเชื่อมต่อ
เริ่มต้น LogtoClient
เริ่มต้นไคลเอนต์โดยการสร้างอินสแตนซ์ LogtoClient ด้วยอ็อบเจกต์ LogtoConfig
import Logto
import LogtoClient

let config = try? LogtoConfig(
  endpoint: "<your-logto-endpoint>", // เช่น http://localhost:3001
  appId: "<your-app-id>"
)
let client = LogtoClient(useConfig: config)
โดยปกติ เราจะจัดเก็บข้อมูลรับรอง เช่น โทเค็น ID (ID Token) และ โทเค็นรีเฟรช (Refresh Token) ไว้ใน Keychain ดังนั้นผู้ใช้จึงไม่จำเป็นต้องลงชื่อเข้าใช้อีกเมื่อกลับมา
หากต้องการปิดการทำงานนี้ ให้ตั้งค่า usingPersistStorage เป็น false:
let config = try? LogtoConfig(
  // ...
  usingPersistStorage: false
)
ดำเนินการลงชื่อเข้าใช้และออกจากระบบ
ก่อนที่เราจะลงลึกในรายละเอียด นี่คือภาพรวมประสบการณ์ของผู้ใช้ปลายทาง กระบวนการลงชื่อเข้าใช้สามารถสรุปได้ดังนี้:
- แอปของคุณเรียกใช้งานเมธอดลงชื่อเข้าใช้
- ผู้ใช้จะถูกเปลี่ยนเส้นทางไปยังหน้าลงชื่อเข้าใช้ของ Logto สำหรับแอปเนทีฟ ระบบจะเปิดเบราว์เซอร์ของระบบ
- ผู้ใช้ลงชื่อเข้าใช้และถูกเปลี่ยนเส้นทางกลับไปยังแอปของคุณ (ตามที่กำหนดไว้ใน redirect URI)
เกี่ยวกับการลงชื่อเข้าใช้แบบเปลี่ยนเส้นทาง (redirect-based sign-in)
- กระบวนการยืนยันตัวตนนี้เป็นไปตามโปรโตคอล OpenID Connect (OIDC) และ Logto บังคับใช้มาตรการรักษาความปลอดภัยอย่างเข้มงวดเพื่อปกป้องการลงชื่อเข้าใช้ของผู้ใช้
- หากคุณมีหลายแอป คุณสามารถใช้ผู้ให้บริการข้อมูลระบุตัวตน (Logto) เดียวกันได้ เมื่อผู้ใช้ลงชื่อเข้าใช้แอปหนึ่งแล้ว Logto จะดำเนินการลงชื่อเข้าใช้โดยอัตโนมัติเมื่อผู้ใช้เข้าถึงแอปอื่น
หากต้องการเรียนรู้เพิ่มเติมเกี่ยวกับเหตุผลและประโยชน์ของการลงชื่อเข้าใช้แบบเปลี่ยนเส้นทาง โปรดดูที่ อธิบายประสบการณ์การลงชื่อเข้าใช้ของ Logto
Configure redirect URI
- v2 (beta)
- v1
ไปที่หน้ารายละเอียดแอปพลิเคชันของ Logto Console เพิ่ม Redirect URI io.logto.app://callback แล้วคลิก "บันทึกการเปลี่ยนแปลง" (Save changes)
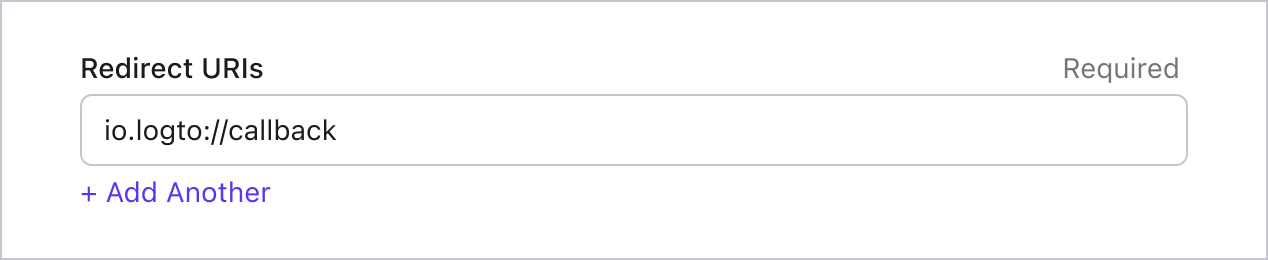
In v2, the sign-in experience opens in ASWebAuthenticationSession (the system browser), and the redirect is routed back to your app through OS-level callback matching. For a custom scheme redirect URI such as io.logto.app://callback, register only the scheme part (io.logto.app) in your app's Info.plist, then add the full redirect URI to your Logto application's Redirect URIs.
In Xcode, open your app target, select Info, expand URL Types, and add one entry with io.logto.app in URL Schemes. If you edit Info.plist directly, add:
<key>CFBundleURLTypes</key>
<array>
  <dict>
    <key>CFBundleTypeRole</key>
    <string>Editor</string>
    <key>CFBundleURLName</key>
    <string>io.logto.app</string>
    <key>CFBundleURLSchemes</key>
    <array>
      <string>io.logto.app</string>
    </array>
  </dict>
</array>
For the browser flow in v2, you do not need to call LogtoClient.handle(url:); that plugin handoff API was removed with the embedded WebView flow.
Use Universal Links instead of a custom scheme?
You can also use an HTTPS redirect URI such as https://example.com/callback:
- Add the Associated Domains capability to your app.
- Configure
webcredentials:example.comsoASWebAuthenticationSessioncan match HTTPS callbacks on iOS 17.4 and newer. - If the same URL should also open your app as a Universal Link outside the authentication session, configure
applinks:example.comand host a validapple-app-site-associationfile for the domain and path. - Add the HTTPS URI to your Logto application's Redirect URIs.
- Pass the same URI to
signInWithBrowser.
On iOS 17.4 and newer, the SDK uses ASWebAuthenticationSession's HTTPS callback matching API so HTTPS redirects can automatically complete and dismiss the session. On older iOS versions, the authorization request can still use the HTTPS redirect URI, but the session may not close automatically unless your app handles the Universal Link callback itself. Keep a custom scheme redirect as a compatibility option if you need automatic completion on older iOS versions.
ไปที่หน้ารายละเอียดแอปพลิเคชันของ Logto Console เพิ่ม Redirect URI io.logto://callback แล้วคลิก "บันทึกการเปลี่ยนแปลง" (Save changes)
The Redirect URI in iOS SDK is only for internal use. There's NO NEED to add a Custom URL Scheme until a connector asks.
Sign-in and sign-out
ก่อนเรียก .signInWithBrowser(redirectUri:) โปรดตรวจสอบให้แน่ใจว่าคุณได้กำหนดค่า Redirect URI ใน Admin Console อย่างถูกต้องแล้ว
- v2 (beta)
- v1
In v2, client.signOut(postLogoutRedirectUri:) performs a complete sign-out: it clears the local credentials, revokes the refresh token, and ends the Logto session by opening the end session endpoint in the system browser. The browser then navigates back to your app through the post sign-out redirect URI. Before using it, switch to the application details page of Logto Console, add the post sign-out redirect URI io.logto.app://signed-out and click "Save changes". The post sign-out redirect URI can use the same custom scheme you registered for sign-in.
For example, in a SwiftUI app:
struct ContentView: View {
  @State var isAuthenticated: Bool

  private let redirectUri = "io.logto.app://callback"
  private let postLogoutRedirectUri = "io.logto.app://signed-out"

  init() {
    isAuthenticated = client.isAuthenticated
  }

  var body: some View {
    VStack {
      if isAuthenticated {
        Button("Sign Out") {
          Task { [self] in
            let error = await client.signOut(postLogoutRedirectUri: postLogoutRedirectUri)
            if let error = error {
              print(error)
              return
            }
            isAuthenticated = false
          }
        }
      } else {
        Button("Sign In") {
          Task { [self] in
            do {
              try await client.signInWithBrowser(redirectUri: redirectUri)
              isAuthenticated = true
            } catch let error as LogtoClientErrors.SignIn {
              // error occurred during sign in
            } catch {
              // other errors
            }
          }
        }
      }
    }
  }
}
- You can also call
client.signOut()without a post sign-out redirect URI. No Console configuration is needed in this case: the browser shows the Logto sign-out page, and the user returns to the app by dismissing it manually. - If no UI context is available, you can call
client.clearCredentials()to clear the local credentials and revoke the refresh token. Note that this keeps the Logto session in the browser, so the nextsignInWithBrowsermay silently sign the user back in through that session.
You can use client.signInWithBrowser(redirectUri:) to sign in the user and client.signOut() to sign out the user.
For example, in a SwiftUI app:
struct ContentView: View {
  @State var isAuthenticated: Bool

  init() {
    isAuthenticated = client.isAuthenticated
  }

  var body: some View {
    VStack {
      if isAuthenticated {
        Button("Sign Out") {
          Task { [self] in
            await client.signOut()
            isAuthenticated = false
          }
        }
      } else {
        Button("Sign In") {
          Task { [self] in
            do {
              try await client.signInWithBrowser(redirectUri: "io.logto://callback")
              isAuthenticated = true
            } catch let error as LogtoClientErrors.SignIn {
              // error occurred during sign in
            } catch {
              // other errors
            }
          }
        }
      }
    }
  }
}
จุดตรวจสอบ: ทดสอบแอปพลิเคชันของคุณ
ตอนนี้คุณสามารถทดสอบแอปพลิเคชันของคุณได้แล้ว:
- รันแอปพลิเคชันของคุณ คุณจะเห็นปุ่มลงชื่อเข้าใช้
- คลิกปุ่มลงชื่อเข้าใช้ SDK จะเริ่มกระบวนการลงชื่อเข้าใช้และเปลี่ยนเส้นทางคุณไปยังหน้าลงชื่อเข้าใช้ของ Logto
- หลังจากที่คุณลงชื่อเข้าใช้แล้ว คุณจะถูกเปลี่ยนเส้นทางกลับไปยังแอปพลิเคชันของคุณและเห็นปุ่มลงชื่อออก
- คลิกปุ่มลงชื่อออกเพื่อเคลียร์ที่เก็บโทเค็นและออกจากระบบ
รับข้อมูลผู้ใช้
แสดงข้อมูลผู้ใช้
หากต้องการแสดงข้อมูลของผู้ใช้ คุณสามารถใช้เมธอด client.getIdTokenClaims() ตัวอย่างเช่น ในแอป SwiftUI:
// ตัวอย่างนี้แสดงชื่อผู้ใช้หลังจากลงชื่อเข้าใช้สำเร็จ
struct ContentView: View {
  @State var isAuthenticated: Bool
  @State var name: String?

  init() {
    isAuthenticated = client.isAuthenticated
    name = try? client.getIdTokenClaims().name
  }

  var body: some View {
    VStack {
      if isAuthenticated {
        Text("Welcome, \(name)")
      } else {
        Text("Please sign in")
      }
    }
  }
}
ขอการอ้างสิทธิ์เพิ่มเติม
คุณอาจพบว่าข้อมูลผู้ใช้บางอย่างหายไปในอ็อบเจกต์ที่ส่งคืนจาก client.getIdTokenClaims() สาเหตุเนื่องจาก OAuth 2.0 และ OpenID Connect (OIDC) ถูกออกแบบมาให้สอดคล้องกับหลักการสิทธิ์น้อยที่สุด (principle of least privilege; PoLP) และ Logto ถูกสร้างขึ้นบนมาตรฐานเหล่านี้
โดยปกติแล้ว จะมีการส่งคืนการอ้างสิทธิ์ (claim) แบบจำกัด หากคุณต้องการข้อมูลเพิ่มเติม คุณสามารถร้องขอขอบเขต (scope) เพิ่มเติมเพื่อเข้าถึงการอ้างสิทธิ์ (claim) ที่มากขึ้นได้
"การอ้างสิทธิ์ (Claim)" คือการยืนยันข้อมูลบางอย่างเกี่ยวกับผู้ถูกอ้างถึง (subject); "ขอบเขต (Scope)" คือกลุ่มของการอ้างสิทธิ์ (claim) ในกรณีนี้ การอ้างสิทธิ์ (claim) คือข้อมูลบางอย่างเกี่ยวกับผู้ใช้
ตัวอย่างที่ไม่เป็นทางการของความสัมพันธ์ระหว่างขอบเขต (scope) กับการอ้างสิทธิ์ (claim) มีดังนี้:
การอ้างสิทธิ์ (claim) "sub" หมายถึง "ผู้ถูกอ้างถึง (subject)" ซึ่งคือตัวระบุที่ไม่ซ้ำของผู้ใช้ (เช่น user ID)
Logto SDK จะร้องขอขอบเขต (scope) สามรายการเสมอ ได้แก่ openid, profile และ offline_access
หากต้องการขอขอบเขต (scopes) เพิ่มเติม คุณสามารถส่ง scopes ไปยังอ็อบเจกต์ LogtoConfig ตัวอย่างเช่น:
let config = try? LogtoConfig(
  endpoint: "<your-logto-endpoint>", // เช่น http://localhost:3001
  appId: "<your-app-id>",
  scopes: [
    UserScope.Email.rawValue,
    UserScope.Phone.rawValue,
  ]
)
จากนั้นคุณสามารถเข้าถึงการอ้างสิทธิ์เพิ่มเติมในค่าที่คืนมาจาก client.getIdTokenClaims():
let claims = try? client.getIdTokenClaims()
// ตอนนี้คุณสามารถเข้าถึงการอ้างสิทธิ์เพิ่มเติม เช่น `claims.email`, `claims.phone` เป็นต้น
การอ้างสิทธิ์ (Claims) ที่ต้องใช้การร้องขอผ่านเครือข่าย
เพื่อป้องกันไม่ให้โทเค็น ID (ID token) มีขนาดใหญ่เกินไป การอ้างสิทธิ์บางรายการจำเป็นต้องร้องขอผ่านเครือข่ายเพื่อดึงข้อมูล ตัวอย่างเช่น การอ้างสิทธิ์ custom_data จะไม่ถูกรวมอยู่ในอ็อบเจกต์ผู้ใช้ แม้ว่าจะร้องขอไว้ในขอบเขต (scopes) ก็ตาม หากต้องการเข้าถึงการอ้างสิทธิ์เหล่านี้ คุณสามารถใช้เมธอด client.fetchUserInfo():
let userInfo = try? client.fetchUserInfo()
// ตอนนี้คุณสามารถเข้าถึงการอ้างสิทธิ์ `userInfo.custom_data`
ขอบเขตและการอ้างสิทธิ์
Logto ใช้แนวทาง ขอบเขต (Scope) และ การอ้างสิทธิ์ (Claim) ของ OIDC เพื่อกำหนดขอบเขตและการอ้างสิทธิ์สำหรับดึงข้อมูลผู้ใช้จากโทเค็น ID (ID token) และ OIDC จุดปลาย userinfo ทั้ง "ขอบเขต (Scope)" และ "การอ้างสิทธิ์ (Claim)" เป็นคำศัพท์จากข้อกำหนดของ OAuth 2.0 และ OpenID Connect (OIDC)
สำหรับการอ้างสิทธิ์ OIDC มาตรฐาน การรวมอยู่ในโทเค็น ID จะถูกกำหนดอย่างเคร่งครัดโดยขอบเขตที่ร้องขอ การอ้างสิทธิ์เพิ่มเติม (เช่น custom_data และ organizations) สามารถตั้งค่าเพิ่มเติมให้ปรากฏในโทเค็น ID ได้ผ่าน การตั้งค่า Custom ID token
ต่อไปนี้คือรายการขอบเขต (Scopes) ที่รองรับและการอ้างสิทธิ์ (Claims) ที่เกี่ยวข้อง:
ขอบเขต OIDC มาตรฐาน
openid (ค่าเริ่มต้น)
| ชื่อการอ้างสิทธิ์ | ประเภท | คำอธิบาย |
|---|---|---|
| sub | string | ตัวระบุที่ไม่ซ้ำของผู้ใช้ |
profile (ค่าเริ่มต้น)
| ชื่อการอ้างสิทธิ์ | ประเภท | คำอธิบาย |
|---|---|---|
| name | string | ชื่อเต็มของผู้ใช้ |
| username | string | ชื่อผู้ใช้ของผู้ใช้ |
| picture | string | URL ของรูปโปรไฟล์ผู้ใช้ปลายทาง (End-User) URL นี้ต้องอ้างถึงไฟล์รูปภาพ (เช่น PNG, JPEG, หรือ GIF) ไม่ใช่หน้าเว็บที่มีรูปภาพ โปรดทราบว่า URL นี้ควรอ้างอิงถึงรูปโปรไฟล์ของผู้ใช้ปลายทางโดยเฉพาะ เหมาะสำหรับแสดงเมื่ออธิบายผู้ใช้ปลายทาง ไม่ใช่รูปภาพใด ๆ ที่ผู้ใช้ถ่ายมาโดยพลการ |
| created_at | number | เวลาที่สร้างผู้ใช้ปลายทาง เวลานี้แสดงเป็นจำนวนมิลลิวินาทีตั้งแต่ Unix epoch (1970-01-01T00:00:00Z) |
| updated_at | number | เวลาที่ข้อมูลของผู้ใช้ปลายทางถูกอัปเดตล่าสุด เวลานี้แสดงเป็นจำนวนมิลลิวินาทีตั้งแต่ Unix epoch (1970-01-01T00:00:00Z) |
การอ้างสิทธิ์มาตรฐาน อื่น ๆ เช่น family_name, given_name, middle_name, nickname, preferred_username, profile, website, gender, birthdate, zoneinfo, และ locale จะถูกรวมอยู่ในขอบเขต profile ด้วยโดยไม่จำเป็นต้องร้องขอ endpoint userinfo ความแตกต่างเมื่อเทียบกับการอ้างสิทธิ์ข้างต้นคือ การอ้างสิทธิ์เหล่านี้จะถูกส่งกลับเมื่อค่าของมันไม่ว่างเปล่าเท่านั้น ในขณะที่การอ้างสิทธิ์ข้างต้นจะคืนค่า null หากค่าว่างเปล่า
ต่างจากการอ้างสิทธิ์มาตรฐาน การอ้างสิทธิ์ created_at และ updated_at ใช้หน่วยเป็นมิลลิวินาทีแทนที่จะเป็นวินาที
email
| ชื่อการอ้างสิทธิ์ | ประเภท | คำอธิบาย |
|---|---|---|
string | อีเมลของผู้ใช้ | |
| email_verified | boolean | อีเมลได้รับการยืนยันแล้วหรือไม่ |
phone
| ชื่อการอ้างสิทธิ์ | ประเภท | คำอธิบาย |
|---|---|---|
| phone_number | string | เบอร์โทรศัพท์ของผู้ใช้ |
| phone_number_verified | boolean | เบอร์โทรศัพท์ได้รับการยืนยันแล้วหรือไม่ |
address
โปรดดูรายละเอียดของการอ้างสิทธิ์ที่อยู่ได้ที่ OpenID Connect Core 1.0
ขอบเขตที่มีเครื่องหมาย (ค่าเริ่มต้น) จะถูกร้องขอเสมอโดย Logto SDK การอ้างสิทธิ์ภายใต้ขอบเขต OIDC มาตรฐานจะถูกรวมอยู่ในโทเค็น ID เสมอเมื่อมีการร้องขอขอบเขตที่เกี่ยวข้อง — ไม่สามารถปิดได้
ขอบเขตเพิ่มเติม
ขอบเขตต่อไปนี้เป็นขอบเขตที่ Logto ขยายขึ้นและจะคืนค่าการอ้างสิทธิ์ผ่าน userinfo endpoint การอ้างสิทธิ์เหล่านี้ยังสามารถตั้งค่าให้ถูกรวมอยู่ในโทเค็น ID ได้โดยตรงผ่าน Console > Custom JWT ดู Custom ID token สำหรับรายละเอียดเพิ่มเติม
custom_data
| ชื่อการอ้างสิทธิ์ | ประเภท | คำอธิบาย | รวมในโทเค็น ID โดยค่าเริ่มต้น |
|---|---|---|---|
| custom_data | object | ข้อมูลกำหนดเองของผู้ใช้ |
identities
| ชื่อการอ้างสิทธิ์ | ประเภท | คำอธิบาย | รวมในโทเค็น ID โดยค่าเริ่มต้น |
|---|---|---|---|
| identities | object | ข้อมูลตัวตนที่เชื่อมโยงของผู้ใช้ | |
| sso_identities | array | ข้อมูล SSO ที่เชื่อมโยงของผู้ใช้ |
roles
| ชื่อการอ้างสิทธิ์ | ประเภท | คำอธิบาย | รวมในโทเค็น ID โดยค่าเริ่มต้น |
|---|---|---|---|
| roles | string[] | บทบาท (Role) ของผู้ใช้ | ✅ |
urn:logto:scope:organizations
| ชื่อการอ้างสิทธิ์ | ประเภท | คำอธิบาย | รวมในโทเค็น ID โดยค่าเริ่มต้น |
|---|---|---|---|
| organizations | string[] | รหัสองค์กรที่ผู้ใช้สังกัด | ✅ |
| organization_data | object[] | ข้อมูลองค์กรที่ผู้ใช้สังกัด |
การอ้างสิทธิ์ขององค์กรเหล่านี้สามารถดึงได้ผ่าน userinfo endpoint เมื่อใช้ โทเค็นทึบ (Opaque token) อย่างไรก็ตาม โทเค็นทึบไม่สามารถใช้เป็นโทเค็นองค์กรสำหรับเข้าถึงทรัพยากรเฉพาะองค์กร ดู โทเค็นทึบและองค์กร สำหรับรายละเอียดเพิ่มเติม
urn:logto:scope:organization_roles
| ชื่อการอ้างสิทธิ์ | ประเภท | คำอธิบาย | รวมในโทเค็น ID โดยค่าเริ่มต้น |
|---|---|---|---|
| organization_roles | string[] | บทบาทขององค์กรที่ผู้ใช้สังกัดในรูปแบบ <organization_id>:<role_name> | ✅ |
ทรัพยากร API
เราแนะนำให้อ่าน 🔐 การควบคุมการเข้าถึงตามบทบาท (RBAC) ก่อน เพื่อทำความเข้าใจแนวคิดพื้นฐานของ RBAC ใน Logto และวิธีตั้งค่าทรัพยากร API อย่างถูกต้อง
กำหนดค่าไคลเอนต์ Logto
เมื่อคุณตั้งค่า ทรัพยากร API (API resources) เรียบร้อยแล้ว คุณสามารถเพิ่มทรัพยากรเหล่านี้ขณะกำหนดค่า Logto ในแอปของคุณได้:
let config = try? LogtoConfig(
  endpoint: "<your-logto-endpoint>", // เช่น http://localhost:3001
  appId: "<your-app-id>",
  resources: ["https://shopping.your-app.com/api", "https://store.your-app.com/api"], // เพิ่มทรัพยากร API (API resources)
)
let client = LogtoClient(useConfig: config)
แต่ละ ทรัพยากร API (API resource) จะมี สิทธิ์ (scopes) ของตัวเอง
ตัวอย่างเช่น ทรัพยากร https://shopping.your-app.com/api มีสิทธิ์ shopping:read และ shopping:write และทรัพยากร https://store.your-app.com/api มีสิทธิ์ store:read และ store:write
หากต้องการร้องขอสิทธิ์เหล่านี้ คุณสามารถเพิ่มขณะกำหนดค่า Logto ในแอปของคุณได้:
let config = try? LogtoConfig(
  endpoint: "<your-logto-endpoint>",
  appId: "<your-app-id>",
  // scopes: ขอบเขตการอนุญาตที่ต้องการ
  scopes: ["shopping:read", "shopping:write", "store:read", "store:write"],
  // resources: ทรัพยากร API ที่ต้องการเข้าถึง
  resources: ["https://shopping.your-app.com/api", "https://store.your-app.com/api"],
)
let client = LogtoClient(useConfig: config)
คุณอาจสังเกตได้ว่า ขอบเขต (scopes) ถูกกำหนดแยกจาก ทรัพยากร API (API resources) นี่เป็นเพราะ Resource Indicators for OAuth 2.0 ระบุว่า ขอบเขตสุดท้ายสำหรับคำขอจะเป็นผลคูณคาร์ทีเซียนของขอบเขตทั้งหมดในบริการเป้าหมายทั้งหมด
ดังนั้น ในกรณีข้างต้น ขอบเขต (scopes) สามารถทำให้เรียบง่ายขึ้นจากการกำหนดใน Logto โดยทั้งสอง ทรัพยากร API (API resources) สามารถมีขอบเขต read และ write ได้โดยไม่ต้องมีคำนำหน้า จากนั้น ในการตั้งค่า Logto:
let config = try? LogtoConfig(
  endpoint: "<your-logto-endpoint>",
  appId: "<your-app-id>",
  scopes: ["read", "write"], // ขอบเขตที่ร้องขอ
  resources: ["https://shopping.your-app.com/api", "https://store.your-app.com/api"], // ทรัพยากร API ที่ร้องขอ
)
let client = LogtoClient(useConfig: config)
สำหรับแต่ละ ทรัพยากร API (API resource) จะร้องขอทั้งขอบเขต read และ write
คุณสามารถร้องขอขอบเขต (scopes) ที่ไม่ได้กำหนดไว้ใน ทรัพยากร API (API resources) ได้ เช่น คุณสามารถร้องขอขอบเขต email ได้ แม้ว่า ทรัพยากร API (API resources) จะไม่มีขอบเขต email ให้ ขอบเขตที่ไม่มีจะถูกละเว้นอย่างปลอดภัย
หลังจากลงชื่อเข้าใช้สำเร็จ Logto จะออกขอบเขตที่เหมาะสมให้กับ ทรัพยากร API (API resources) ตามบทบาทของผู้ใช้
ดึงโทเค็นการเข้าถึง (Access token) สำหรับทรัพยากร API
เพื่อดึงโทเค็นการเข้าถึง (Access token) สำหรับทรัพยากร API เฉพาะ คุณสามารถใช้เมธอด getAccessToken ได้ดังนี้:
let accessToken = try await client.getAccessToken(for: "https://shopping.your-app.com/api")
// ดึงโทเค็นการเข้าถึง (access token)
เมธอดนี้จะส่งคืนโทเค็นการเข้าถึง (JWT access token) ที่สามารถใช้เข้าถึงทรัพยากร API ได้เมื่อผู้ใช้มีสิทธิ์ที่เกี่ยวข้อง หากโทเค็นการเข้าถึงที่แคชไว้หมดอายุแล้ว เมธอดนี้จะพยายามใช้โทเค็นรีเฟรช (Refresh token) เพื่อขอโทเค็นการเข้าถึงใหม่โดยอัตโนมัติ
แนบโทเค็นการเข้าถึงกับ request headers
ให้นำโทเค็นใส่ในฟิลด์ Authorization ของ HTTP headers ในรูปแบบ Bearer (Bearer YOUR_TOKEN) ก็พร้อมใช้งาน
ขั้นตอนการเชื่อมต่อ Bearer Token อาจแตกต่างกันไปตาม framework หรือ requester ที่คุณใช้ เลือกวิธีที่เหมาะสมในการใส่ request header Authorization
await LogtoRequest.get(
  useSession: session,
  endpoint: userInfoEndpoint,
  headers: ["Authorization": "Bearer \(accessToken)"]
)